 So recently I’ve been working on improving and streamlining our imaging process. One of the pain points that I have had with Windows 10 was an easy way of setting the default wallpaper, but without locking out the user, i.e. Group Policy from changing it in the future. After a long session of Google Fu and finding Powershell and VB scripts I settled on a simple solution of a batch file to take ownership and replace the default wallpaper files.
As the majority of our devices are laptops, I set the default img0.jpg to a resolution of 1366 x 768 and then proceeded to create all of the different resolutions in the 4K folder, 1024×768, 1200×1920, 1366×768, 1600×2560, 1920×1200, 2160×3840, 2560×1440, 2560×1600, 3840×2160, 768×1024, 768×1366. Once I had all the images ready, I created a file structure and then made the below batch or cmd file for my Application Install Task. If you are running SCCM instead of just MDT, change Administrators to SYSTEM.
takeown /f c:\windows\WEB\wallpaper\Windows\img0.jpg

takeown /f C:\Windows\Web\4K\Wallpaper\Windows\*.*

icacls c:\windows\WEB\wallpaper\Windows\img0.jpg /Grant Administrators:(F)

icacls C:\Windows\Web\4K\Wallpaper\Windows\*.* /Grant Administrators:(F)

del c:\windows\WEB\wallpaper\Windows\img0.jpg

del /q C:\Windows\Web\4K\Wallpaper\Windows\*.*

copy "%~dp0img0.jpg" c:\windows\WEB\wallpaper\Windows\img0.jpg

copy "%~dp04k\*.*" C:\Windows\Web\4K\Wallpaper\Windows
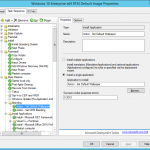
Once I had everything ready, I created an New Application Install called Action – Set Default Wallpaper and got it to call my batch file. Once that was done, I went and added it into my Task Sequence for building our Windows 10 Image as one of the first items to run once Windows 10 has passed the OOBE stage, so under State Restore, after the Windows Updates.
That process has worked every time flawlessly for me, where as the scripts I had found didn’t.