Bypassing Anti-Spam on an Exchange 2007/2010 Receive Connector

I was looking at an old Exchange environment that was being used to send bulk mail outs. We noticed every now and again a bunch of e-mails would not be getting sent, trawling through Message Tracking Logs we could see that the messages were failing because of an AGENT FAIL which usually means that there is a transport agent blocking those messages.

The customer still wanted the anti-spam agents enabled so instead we used PowerShell to modify the receive connector to bypass the Spam Filtering by giving the anonymous logon extended right ms-exch-bypass-anti-spam. Use the following PowerShell cmdlet and modify the Receive Connector with the name of your Connector.

Get-ReceiveConnector "Receive Connector" | Add-ADPermission 
-User "NT AuthorityAnonymous Logon" -AccessRights ExtendedRight 
-ExtendedRights ms-exch-bypass-anti-spam

Hope that helps.
Fixing The trust relationship between this computer and the primary domain failed Error when restoring a Snapshot or Old Virtual Machine

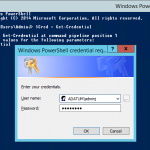
I had a VM snapshot/checkpoint running for several months in my test lab and after reverting the snapshot back I went to login to the machine and got the dreaded Trust relationship between this computer and the primary domain failed error message.  So I logged in as a local admin onto that machine, opened up an Administrative PowerShell window and entered the below commands.

$cred = Get-Credential – (enter domain admin account when prompted)
Reset-ComputerMachinePassword -Credential $cred -Server ada-dc-02.adatum.com.au

Replace the server at the end with a FQDN of one of your Domain Controllers.  As I wasn’t authenticated to the domain, I needed to enter my domain admin credentials by using the Get-Credential cmdlet and then using those stored credentials to issue the Reset-ComputerMachinePassword cmdlet.

So there you have it, no more re-joining a computer to the domain.