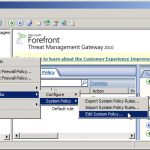
How to Fix being unable to add, edit or delete domain controllers in the Domain Controllers Computer Set on Microsoft TMG or ISA 2006

TMG-EditSystemPolicyThere seems to be a bug in Microsoft’s TMG (Threat Management Gateway) / ISA 2006 (Internet Security and Acceleration Server) that once installed and configured, prevents an administrator from modifying the entries in the Domain Controllers Computer Set.  This Computer set is used in a number of System Policies and if you ever do an IP address change of a DC contained in this group (which is what I needed to do), it needs to be changed for things to continue to function correctly.  Firstly, we will need to get into the Registry to verify the GUID of the Computer Set (be default it is generally {F77C3B63-0DD8-440B-9921-A9341533A9C6}).  Navigate to HKLM\Software\Microsoft\Fpc\Storage\Array-Root\Arrays\{GUID}\RuleElements\ComputerSets and find the Domain Controllers computer set and note down the GUID.

Now we need to start-up ADSI Edit on the TMG / ISA machine.  Connect to localhost on port 2171 with the Naming Context CN=FPC2. Expand to the following CN=FPC2, CN=Array-Root, CN=Arrays, CN={3E5A92A0-0C54-4BD5-A8EB-1A0F1E77FF79}, CN=RuleElements, CN=ComputerSets.  Locate the GUID we found before and right-click and select properties.  Now under the Attribute Editor find msFPCPrefined attribute and set it from True to False.

Restart the TMG / ISA Console (no need to restart any services) and you should now be able to go into the Domain Controllers Computer Set and perform changes as required.

Default printer changes after Terminal Server (or print spooler service) restart

Just a quick post today.  I was troubleshooting an issue where a user would set a default network printer (say Printer01) in their user profile, upon a server restart (which happens nightly) their printer would be set back to the Adobe PDF local printer.  After going through event logs and some basic troubleshooting through Group Policy I quickly came to the conclusion that this was more of a user profile issue than a deployment one.

After a bit of Google-foo, I found that Windows stored user based printer connection details in the registry under HKEY_USERS\<user SID here>\Printers\Connections.  It also stored local settings for each printer under HKEY_USERS\<user SID here>\Printers\Settings.  I went through the printer keys under each registry key and found printers that no longer existed.

Simply deleting printers that were no longer available let the user set a default printer and the setting stayed after a server or print spooler service reboot.

How to protect all existing Organizational Units (OUs) in your Active Directory domain from Accidental Deletion by using PowerShell

We recently took on a new hire, although I was confident in their ability in managing Active Directory I wanted to take an extra step in protecting Organizational units from deletion.  I was sure that I could do this quickly using PowerShell instead of right-clicking each of our 80 odd OUs and going into their properties.

To do this we need to open the Active Directory Module for Windows PowerShell as an administrator.  Since I began in my System Admin role, I was creating OUs that were protected, so I only really needed to do this to the ones that were already here.  So first we need to work out what OUs are not protected from this list using PowerShell I can easily pipe it into the command we need to issue to protect the OUs

The first command below will output a list of all OUs currently not protected.

Get-ADOrganizationalUnit -filter * -Properties ProtectedFromAccidentalDeletion | 
where {$_.ProtectedFromAccidentalDeletion -eq $false} | ft

This command does the above but also sets the ProtectedFromAccidtenalDeletion to True.

Get-ADOrganizationalUnit -filter * -Properties ProtectedFromAccidentalDeletion | 
where {$_.ProtectedFromAccidentalDeletion -eq $false} | Set-ADOrganizationalUnit 
-ProtectedFromAccidentalDeletion $true

Once this command is issued, all the Organizational Units in our Active Directory have become protected and should help prevent you from getting into those sticky situations where someone (could be you) from deleting one by mistake.

Remove all disabled user from an Active Directory Group with Power Shell using Quest Active Roles AD Management

The following code snippet which I ran through PowerShell ISE (learn how to get it on Windows Server) will remove all disabled users from a particular group.  Useful for the end of year / start of year clean up in a school environment.

You will need the ActiveRoles Management Shell for Active Directory, available by clicking here which were made by Quest Software, now DELL.

Add-PSSnapin Quest.ActiveRoles.ADManagement

Get-QADGroup -SearchRoot "" | Foreach-Object {
     $group = $_
     Get-QADGroupMember -Identity $group -Disabled -Type User | Foreach-Object{
         Write-Host "Removing '$($_.Name)' from group '$group'" -Foreground Green
         Remove-QADGroupMember -Identity $group -Member $_ 
     }
 }

Swap out with a distinguished name of the group you want to remove disabled users from.  Once you execute it, it will run through the group and remove any user objects that are disabled.

Getting Folder Sizes and number of items in a Mailbox for a particular user on Microsoft Exchange using PowerShell

Recently one of our high-end users was going over their mailbox limit. In helping them to cut down I like to let them know what folders are using up the most of their quota (generally it is their sent items folder, but sometimes not). Executing the below PowerShell command in an Exchange Administration Shell gave me a nice ordered list (see output below) of folders in their mailbox along with an associated size and number of items.

Get-MailboxFolderStatistics -Identity <username> | Sort-Object FolderSize 
-Descending | FT folderpath, foldersize, ItemsinFolder -autosize

After executing the above PowerShell you’ll get an output similar to the below

FolderPath                    FolderSize                  ItemsInFolder
----------                    ----------                  -------------
/Inbox                        32.89 MB (34,486,717 bytes)           158
/Carbon Copies                16.9 MB (17,725,567 bytes)            168
/Sent Items                   685.3 KB (701,797 bytes)               14
/Deleted Items                554.4 KB (567,723 bytes)              189
/Calendar                     27.6 KB (28,267 bytes)                  7
/Contacts                     1.492 KB (1,528 bytes)                  4
/Drafts                       138 B (138 bytes)                       1
/Sync Issues/Local Failures   0 B (0 bytes)                           0
/Sync Issues/Conflicts        0 B (0 bytes)                           0
/Sync Issues                  0 B (0 bytes)                           0
/Sync Issues/Server Failures  0 B (0 bytes)                           0

From this I can could then give to the user so they could clear out their mailbox. Hope that helps someone out.

Get-MessageTackingLog cmdlet for Exchange 2010 Returns Cannot process argument transformation on parameter ‘Start’. Cannot convert value to type “System.DateTime” because String was not recognized as a valid DateTime.

Recently, I was conducting some investigative work around mail delivery for a client.  PowerShell cmdlets for Exchange are awesome and give us as administrators some real power in trying to figure out what is wrong.  Some things in PowerShell though don’t take into account the regional language settings of the machine you’re working on.  One example of this that left me scratching my head a little was when I was running Get-MessageTackingLog. Being in Australia we do our date as dd/mm/yyyy so I had the following command ready to run

Get-MessageTrackingLog -Server SRV-MBX-02 -Start "14/08/2014 08:00:00" 
-End "14/08/2014 15:00:00" -Sender "[email protected]" | 
ConvertTo-Html > "C:\Scripts\MsgTrack.html"

When I ran this I got an error around trying to convert a DateTime, I was sure I had entered the right format (also trying – and .)

Cannot process argument transformation on parameter 'Start'. Cannot convert value "14/08/2014 08:00:00" to type "System
.DateTime". Error: "String was not recognized as a valid DateTime.
    + CategoryInfo          : InvalidData: (:) [Get-MessageTrackingLog], ParameterBindin...mationException
    + FullyQualifiedErrorId : ParameterArgumentTransformationError,Get-MessageTrackingLog

After a few minutes, I worked out the date needed to be in US Date/Time format of mm/dd/yyy. Swaping around my month and day got the command to work correctly and pipe out what I was after to a html page.

Interestingly, if you copy and paste a command out of the Tracking Log explorer the date and time format in there is based on the regional settings of the computer you are on, but run them through the Exchange Management Shell and you’ll also receive the above date/time error.

An error occurred while attempting to start the selected virtual machine(s) The security ID structure is invalid (0x80070539)

So I was recently working with some really old Virtual machines in a development environment that came across from another organisation. One particular virtual machine gave me an error message when I tried to start it up “An error occurred while attempting to start the selected virtual machine(s)… The security ID structure is invalid (0x80070539)”.  When this happens, Hyper-V basically doesn’t have permission to start the selected virtual machines under the user.  A quick administrative PowerShell cmdlet will grant me or a user permission and allow us to start the VM up;

Grant-VMConnectAccess -VMName "Name of VM not starting" -UserName 
"DOMAIN\Username of current user"

Changing -VMName to match the virtual machine giving you the error and a DOMAIN\Username of the user you are now logged on as.

Once you issue this command the virtual machine will start without any issues.

Backup MySQL Databases running on a Windows Server using Systems Center Data Protection Manager (DPM) 2012.

Running MySQL on a Windows machine is pretty straight forward.  One of the down sides though is that MySQL is not VSS aware and may mis-behave when back up software such as Data Protection Manager or ShadowProtect.  Data Protection Manager (DPM) has the ability (basically called Pre-Backup and Post-Backup Scripts) to perform actions before and after a backup run.

After installing the DPM Protection Agent onto the computer you want to run the protect (by default its %ProgramFiles%\Microsoft Data Protection Manager\DPM) You’ll find a Scripting Folder and inside a ScriptingConfig.xml file which should only contain XML Schema data, we will want to expand on this by adding the following lines inside ScriptConfiguration

   <DatasourceScriptConfig DataSourceName="Data source">
     ”Path\Script Parameters” 
     "Path\Script Parameters” 
     30

DataSourceName needs to be the name of the Data Source that you are protecting (matching in DPM Console) for example C:\MySQL_Backup and in our case we only want to use a PreBackupScript (ie C:\MySQL_Backup\BackupDB.cmd) which will dump a backup from our MySQL Databse into a single SQL file before the actual DPM Backup event.  As an example, the following will execute a backup for MySQL.  You will need to change -User -Password and the MaharaProd to something that suits your environment.

@echo off
set CurrentDate=%date:~-10,2%_%date:~7,2%_%date:~-4,4%
move /y C:\MySQL_Backup\Mahara-*.sql C:\MySQL_Backup\PreviousBackup.sql
mysqldump –user backupuser –password=changethis MaharaProd > C:\MySQL_Backup\Mahara-%CurrentDate%.sql

The above will output a Mahara-DD_MM_YYYY.sql file as well as make a Previous Backup before allowing DPM to go ahead and create the restore point.

Check out this TechNet article for more details on how to get this running.

Save Time by using CLI to Copy Command Output from HP switches to a TFTP Server

So I was recently doing some troubleshooting and needed to do a “show tech all” on a couple of our Switches to do some further analysis.  My usual way was to fire up PuTTY (or KiTTY which is an improved “fork” of Putty) and do a “show tech all” then manually copy and paste into a waiting notepad window to save the text file.

I recently found out there is a copy command that allows an administrator to copy a large number of configuration and logs files from a switch as well as a command-output option which allows an administrator to specify a CLI command to copy output of.  All you need to take advantage of this feature is an TFTP or SFTP server to copy the output to.  So a sample output to a TFTP server would be (where the IP address is your TFTP server and what ever filename you want to save the output as)

copy command-output "show tech all" tftp 172.16.20.57 show_tech_all.txt

After entering that in, you will see the switch perform the TFTP download with the output of the specified CLI command.  Once done, navigate to your TFTP (or SFTP) server Root Directory and you’ll have a show_tech_all.txt file ready to open in Notepad.  You can also do running config (swName# show run) and crash logs using the method above, just to TAB completion on the copy command to see what is available on your particular switch.

Generate Mailbox Size and Usage Report using PowerShell for Exchange 2010 / 2013

So I recently wanted to create a report to show us who was using up the most space on our mailbox servers, previous administrators had either done away for limits for mailboxes or had set them to be very very generous and our users weren’t really the ones to either keep their mailbox tidy or archive items away.

I knew the quick and easy solution would be powershell and then getting the output to either a CSV file or HTML.  So a bit of a look around TechNet for Get-MailboxStatistics got me the commands I needed, but what else could I select out of that.  After a bit more digging I found a list on MSDN for MailboxStatistics members which allowed me to extract exactly what I was after.  After putting all that together, I cam up with the following

Get-Mailbox -ResultSize Unlimited | Get-MailboxStatistics | Select DisplayName,
TotalItemSize,ItemCount,Database,LastLogonTime,LastLoggedOnUserAccount | Sort 
TotalItemSize -Descending | ConvertTo-Html -Title "Mailbox Stats"| 
Out-file "C:\MailboxStatistics.html"

That gave me a nice HTML page output, you could easily improve on this with colours depending on outputs from StorageLimitStatus or LastLogonTime where we found that some mailboxes hadn’t even been used.