So we’ve been deploying Firefox for quite a while pretty much everywhere we can however, only recently have we started standardising the deployments across the organisation’s that we manage. We’ve deployed Internal Root CAs using the CCK2 method to improve our user experience with Deep Packet SSL inspection however setting up configurations and extensions and having that consistent was a challenge. Recently I learnt that Mozilla begun developing Group Policy Objects not long ago and that now allows for enterprise management straight into Firefox without the fuss. In this article I’ll go through setting up uBlock Origin, HTTPS Everywhere and Privacy Badger which are our go to Extensions for end-user protection.
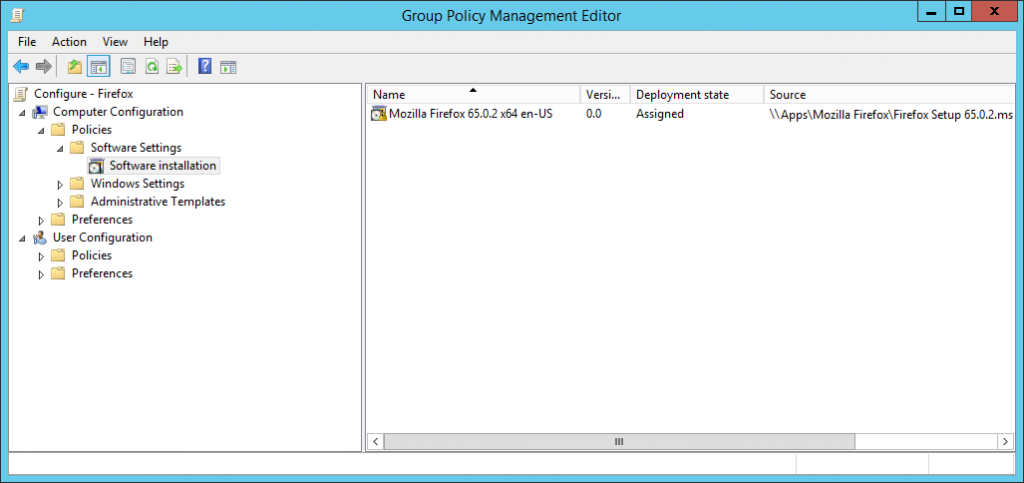
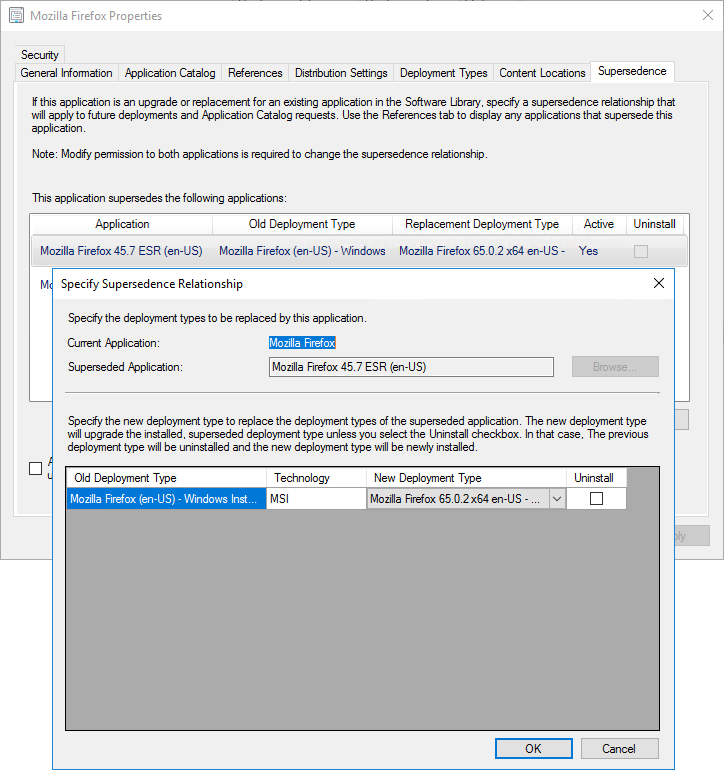
To deploy Firefox (or any windows application), you generally want to use an MSI based installer (for better control and management). Mozilla have now been building them for a shot while via their Enterprise Deployment Support page for beta and standard releases. If you are after the Extended Support Release (ESR), visit the FrontMotion download page (they also offer a number of other services such as a custom packager). In a managed environment you’d either use Group Policy to deploy software or System Center Configuration Manager or some other form of MDM (ala InTune). The MSI should be in a network share accessible by all machines, you would then be imported either into Policies > Software Settings > Software installation for Group Policy (then Right-Click, New > Package) or an Application under the Software Library for Config Manager and pushed out. There are much better guides than what I can fit in here so please Google if you’re unsure. In our case, I used Config Manager and since we’re upgrading and I’ve setup a Supersedence rule like below.
Once Firefox is being deployed we need to get these extensions onto the machines, so the first part is getting the URLs of the extensions you wish to deploy. Visit the add-on store and start searching for what you’re after. For our example, as mentioned we will be installing uBlock Origin, Privacy Badger and HTTPS everywhere. When you are at the add-on page, right-click on the Add to Firefox button and select Copy Link Location and save that for later. Once you have your list of Extensions it should look like something similar to the below (I’ve removed the tracking string at the end).
https://addons.mozilla.org/firefox/downloads/file/1672871/ublock_origin-1.18.4-an+fx.xpi
https://addons.mozilla.org/firefox/downloads/file/1688114/privacy_badger-2019.2.19-an+fx.xpi
https://addons.mozilla.org/firefox/downloads/file/1669416/https_everywhere-2019.1.31-an+fx.xpi
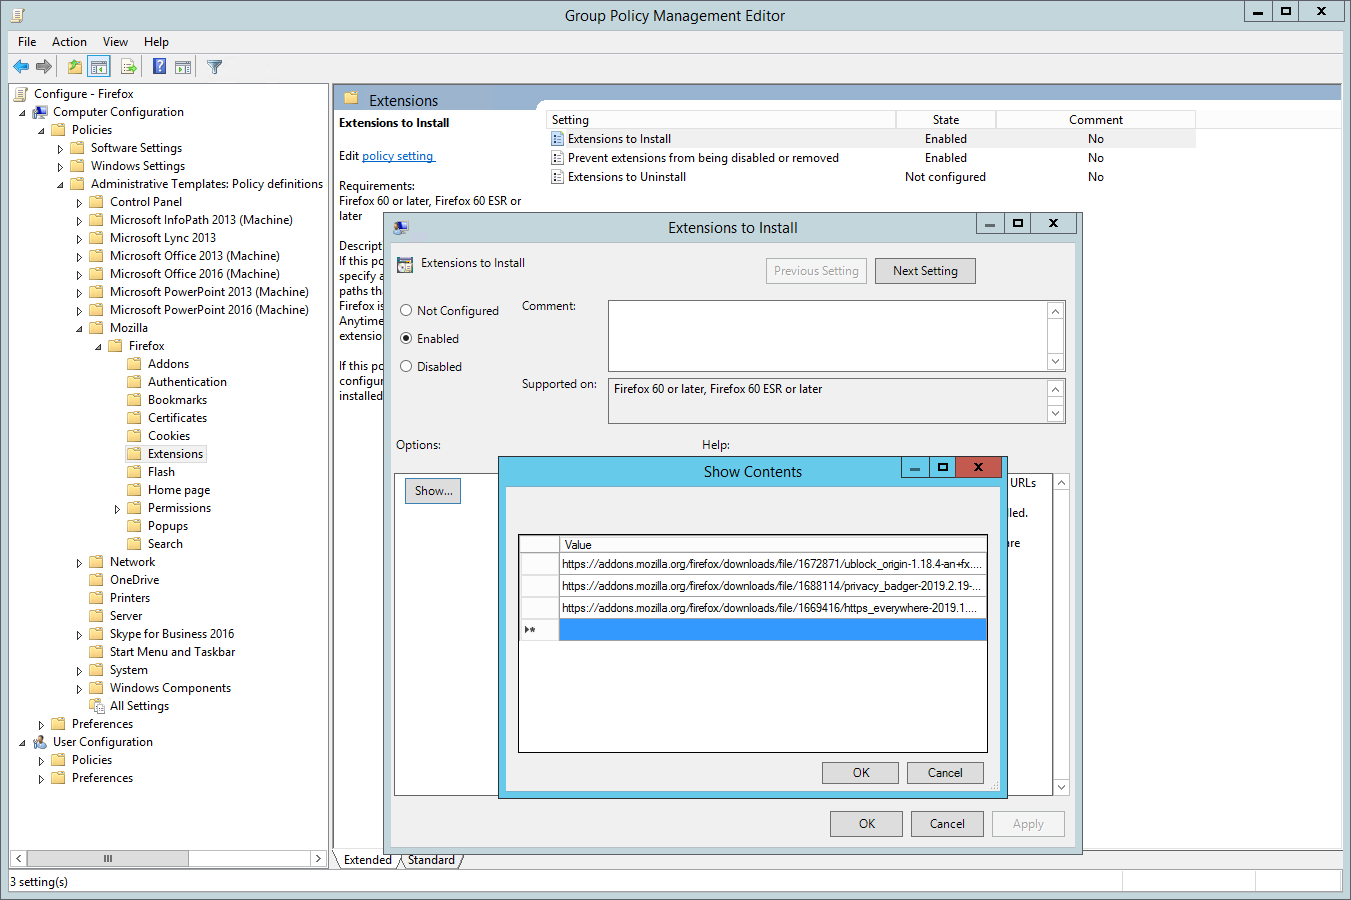
Next is to get the Group Policy Definitions from Mozilla and load them onto your Active Directory Group Policy. I’d highly recommend you have a Group Policy Central Store setup as it makes managing this stuff a whole lot easier. Download the latest version or ones that match your deployment of Firefox from the Mozilla GitHub Releases page, unzip and then copy across those files to the Group Policy Central Store or required location. Now the fun part.
Create a new Group Policy Object, in my case Configure – Firefox and then open it up, and navigate to the following policy branch; Computer Configuration > Policies > Administrative Templates> Mozilla > Firefox > Extensions. Here we will be enabling Extensions to Install. Using the list we compiled earlier, enter the URLs one by one into the list so it will look like something similar to the below.
The next step I’d recommend, is we want to stop or prevent our end users from being able to remove these extensions/protections. To do this we need to get the Extension IDs, so fire up Firefox and install the list of Extensions we compiled earlier (if you didn’t already for testing). Now the easiest way I’ve found of getting the Extension IDs is to use the in-built memory profiler of Firefox. In the address bar enter about:memory and once it loads under Show memory reports group, click Measure. Do a search for Extensions and you’ll get to a list of all currently running extensions. Now extract everything for the id key (in this case a GUID but can be text as well);
Extension(id={d634138d-c276-4fc8-924b-40a0ea21d284}, name="1Password X – Password Manager", baseURL=moz-extension://31872614-f67c-4cda-84e4-18c0515c8b48/
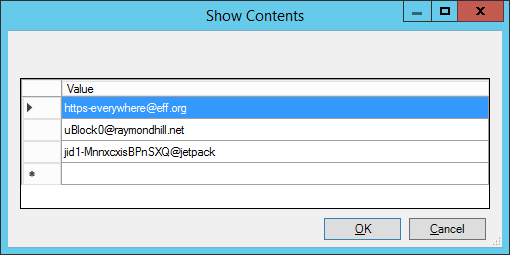
The above is an example of what you’ll find in the list (using 1Password). Below is what we’ll be entering into the Prevent Extensions from being disabled or removed based on our setup so far – with the last line belonging to Privacy Badger.
[email protected]
[email protected]
jid1-MnnxcxisBPnSXQ@jetpack
Now that we have the list of Extension IDs we want to enter these into the Prevent extensions from being disabled or removed Group Policy setting located in the same branch as Extensions to Install. Again, enter them into the list one by one until you have something similar
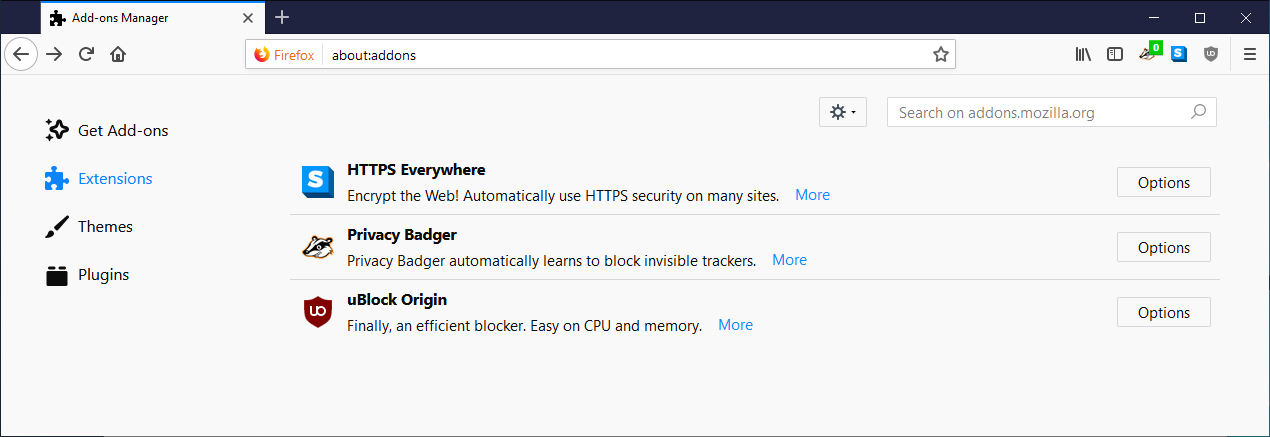
Once that is configured, apply the Group Policy Object to your Test Machines preferably with Mozilla Firefox installed on it, log in and do a gpupdate /force with the end result being those Extensions magically appearing as per the below image.
Hope that helps.