Bad Image Error when installing CrowdStrike sensor on Amazon WorkSpaces

Long time since I’ve posted – I promise I’ve been very busy with life.

I was recently assisting a customer with a CrowdStrike Falcon Sensor deployment and we were in the process of updating the gold images in their VDI platform, Amazon WorkSpaces.  CrowdStrike have a nice installation document on their website that you can follow to get the sensor deployed.  After going through the process (starting from about page 10 since we already have WorkSpaces and using the yearly billing option), we deployed the sensor with the following parameters, with the NO_START being important so that the sensor doesn’t imprint IDs (similar to most other cloud managed tooling).

WindowsSensor.exe /install /norestart CID=<falcon id here> NoFA=1 NoDC=1 NO_START=1

After executing and the progress bar getting about half way, we ended up encountering an error. CSFalconServiceUninstallTool_x64.exe – Bad Image relating to spacedeskHookUmode.dll  Reading up in the CrowdStrike support portal, the error usually relates to Citrix or some sort of DLP protection triggering, however we had neither operating in the VDI environment.

After some further digging, we found a PDF on the Amazon site and found that the culprit is actually part of Amazon WorkSpaces, as the dll file provides the ability to use Web Access.  In our use case, we don’t use this so simply set the following registry keys to disable web access in the image.

HKEY_LOCAL_MACHINE\SOFTWARE\Amazon\WorkSpacesConfig\update-webaccess.ps1

Set the RebootCount DWORD to 1

HKEY_LOCAL_MACHINE\SYSTEM\CurrentControlSet\Services\spacedeskHookKmode

Set the Start DWRORD to 4

Once done, we rebooted and then had a successful sensor install.

Hope that helps.
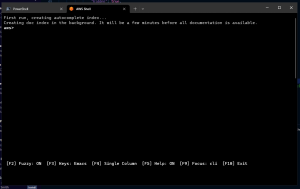
Add AWS CLI to Windows Terminal

I am a fan of Windows Terminal and some of the recent things Microsoft seem to be doing for SysAdmins. I like having all the tools I need in a single spot. Adding the AWS CLI is fairly straight forward but makes life a heap easier.  Start by installing Python from python.org if you don’t already have it on your machine. Once installed (take note of the version, which as of publishing is 3.11) open up Windows Terminal.

Now let’s install AWS Shell using Python, enter the following command

pip install aws-shell

once that completes we will need to locate the aws-shell executable, for quick reference it resides under the user profile like follows Note that Python311 will change depending on the version you have installed.

C:\Users\John\AppData\Local\Programs\Python\Python311\Scripts\aws-shell.exe

We can also use PowerShell to quickly search for it using the following command

(Get-command aws-shell).Path

Now that we have the location, we can begin to configure Windows Terminal. Go into settings from the drop-down menu and under the Profiles section, select Add a new Profile now drop down pick a console that you like and let’s duplicate it (we’ll use PowerShell).

Under Name, enter a better name, such as AWS Shell. For Command Line, enter the path of the aws-shell executable we found earlier. Starting Directory is fine as-is (it isn’t really used). For an icon, you can grab it from this file aws_icon.zip , paste it into the same location as aws-shell and browse to it. You can also customise the appearance and add a background image or change colours as you see fit. You can see an example JSON profile here.

        {
            "name": "AWS Shell",
            "commandline": "C:\\Users\\John\\AppData\\Local\\Programs\\Python\\Python311\\Scripts\\aws-shell.exe",
            "icon" : "C:\\Users\\John\\AppData\\Local\\Programs\\Python\\Python311\\Scripts\\aws-logo.ico",
            "acrylicOpacity" : 0.90,
            "fontFace": "Consolas"
        }

If you decide that you need to edit the JSON file directly, keep in mind that you need to escape special JSON characters, which includes a backslash. You need to escape a single backslash with double backslash.