Add AWS CLI to Windows Terminal

I am a fan of Windows Terminal and some of the recent things Microsoft seem to be doing for SysAdmins. I like having all the tools I need in a single spot. Adding the AWS CLI is fairly straight forward but makes life a heap easier.  Start by installing Python from python.org if you don’t already have it on your machine. Once installed (take note of the version, which as of publishing is 3.11) open up Windows Terminal.

Now let’s install AWS Shell using Python, enter the following command

pip install aws-shell

once that completes we will need to locate the aws-shell executable, for quick reference it resides under the user profile like follows Note that Python311 will change depending on the version you have installed.

C:\Users\John\AppData\Local\Programs\Python\Python311\Scripts\aws-shell.exe

We can also use PowerShell to quickly search for it using the following command

(Get-command aws-shell).Path

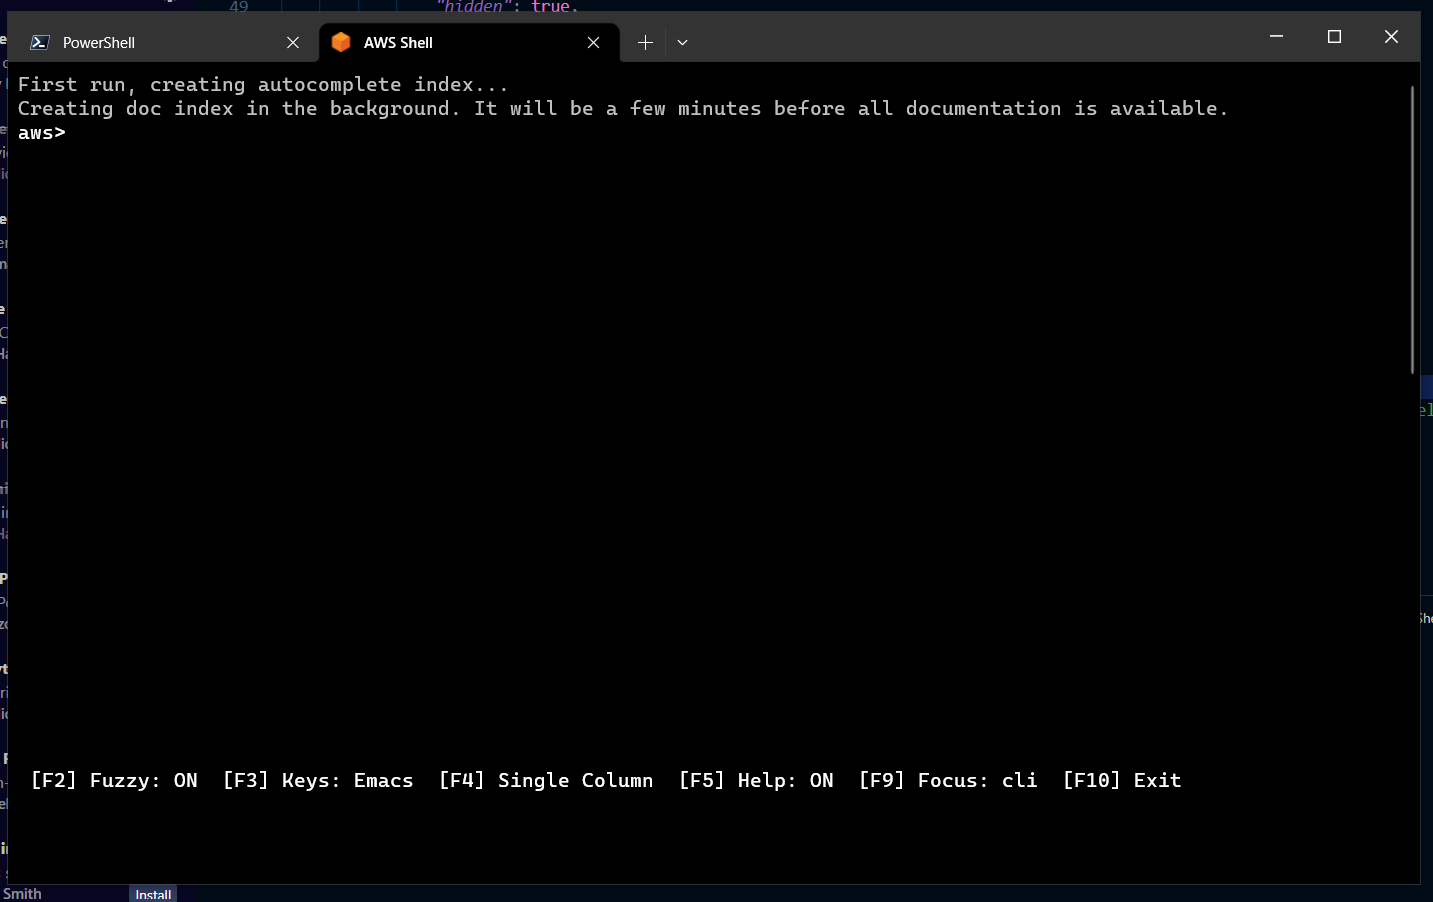
Now that we have the location, we can begin to configure Windows Terminal. Go into settings from the drop-down menu and under the Profiles section, select Add a new Profile now drop down pick a console that you like and let’s duplicate it (we’ll use PowerShell).

Under Name, enter a better name, such as AWS Shell. For Command Line, enter the path of the aws-shell executable we found earlier. Starting Directory is fine as-is (it isn’t really used). For an icon, you can grab it from this file aws_icon.zip, paste it into the same location as aws-shell and browse to it. You can also customise the appearance and add a background image or change colours as you see fit. You can see an example JSON profile here.

        {
            "name": "AWS Shell",
            "commandline": "C:\\Users\\John\\AppData\\Local\\Programs\\Python\\Python311\\Scripts\\aws-shell.exe",
            "icon" : "C:\\Users\\John\\AppData\\Local\\Programs\\Python\\Python311\\Scripts\\aws-logo.ico",
            "acrylicOpacity" : 0.90,
            "fontFace": "Consolas"
        }

If you decide that you need to edit the JSON file directly, keep in mind that you need to escape special JSON characters, which includes a backslash. You need to escape a single backslash with double backslash.

Copying files from one server to another as a different user (two separate domains) using PowerShell

I’ve been working on needed to copy a number of files from one client site to another, my issue is that they have separate Active Directory domains and there is no trust between them. Using PowerShell, we can save a user credential and then use that to map a network drive with them and perform our copy.

We will setup the credential to be stored in a text file, although a cool feature of PowerShell it’s very limited in that it can only be decrypted by the user who created it on the same local machine (which is fine for our needs). The following cmdlet will prompt for a string to encrypt, which in this case is our password.

Read-Host -ASSecureString | ConvertFrom-SecureString | Out-File E:\Scripts\password.txt

Once done, we will build up our PowerShell script that will read the file, map a network drive via PowerShell which will use the secure credentials and then copy across our files.

$password = Get-Content E:\Scripts\password.txt | ConvertTo-SecureString
$credentials = new-object -typename System.Management.Automation.PSCredential -argumentlist "domain\username",$pass

New-PSDrive -Name Z -PSProvider filesystem -Root "\10.15.2.5\Baseline$" -Credential $creds
Remove-Item -Path Z:\ -filter *.bak
Copy-Item -filter *.bak E:\Backup -Destination Z:\ -ErrorAction SilentlyContinue -ErrorVariable A
Remove-PSDrive Z

The script copies files, and is a quick and dirty way to get files from a server in one domain to another without any sort of trust.

Working with Windows File and Folder NTFS Permissions (Copy and Reset)

There have been a few times recently where I’ve had end users do some weird things to either their desktops or development servers they have been working on. If they’re on Dev servers we usually just restore the servers from backup but sometimes we just need to do a quick fix.  The most common issues I find are around permissions (web develpoers tend to muck around with c:\inetpub\wwwroot a lot).  I’ve got a few tricks up my sleeve to deal with it.

Copying permissions from on folder to another is straight-forward with PowerShell

Get-Acl -Path 'C:\DemoFolder' | Set-Acl -Path 'C:\NewDemoFolder'

Other times I find we just need to reset the folder permissions back to what Windows believes the default is

icacls * /T /Q /C /RESET

Another thing is sometimes ownership info needs to be reset too, you can do that with the following command.

takeown /R /F *

Hopefully that helps out.

Get a list of users in Active Directory who have not logged in for specified number of days using PowerShell

A client is currently in the planning stages of doing a migration to Azure AD and Office 365 and one of the things we needed was a list of users who have not logged on in the last few months but are still active in our AD.

Well it’s PowerShell to the rescue again (with Visual Studio Code my IDE of choice) with the following snippet of code which will query an AD environment looking for accounts which haven’t been touched in this case for 90 days and give me a nice CSV of their name and last logon timestamp.

import-module ActiveDirectory 
$domain = "adatum.com.au" 
$DaysInactive = 90
$time = (Get-Date).Adddays(-($DaysInactive))
 
# Get AD Users with lastLogonTimestamp less than time specified and is enabled
Get-ADUser -Filter {LastLogonTimeStamp -lt $time -and enabled -eq $true} -Properties LastLogonTimeStamp |
 
# Output Name and lastLogonTimestamp attributes into CSV
select-object Name,@{Name="Stamp"; Expression={[DateTime]::FromFileTime($_.lastLogonTimestamp).ToString('yyyy-MM-dd')}} | export-csv Inactive_Users.csv -notypeinformation

Save the above into a PS1 and then run this on a server which has the AD PowerShell modules (usually one of your DCs) and will then create a CSV located where the script is with a list of all the users who are still enabled but haven’t logged on in your environment.

Extracting Reporting data from your DirectAccess Server to CSV using PowerShell

I recently had to extract some data from our DirectAccess server to get information about a particular user and their number of connections during a time period along with data transferred. The Remote Access Management Console allows you to view these details but not extract or save them. So I turned to PowerShell and used the following snippet to extract what I needed.

Get-RemoteAccessConnectionStatistics –StartDateTime "1 April 2017 12:00" –EndDateTime "8 April 2017 12:00" | Export-Csv –Path "C:\Temp\DAConnections.csv"

I then cleaned the data up in Excel to give me only the user I was after along with date and times and amount of data transferred. You can also use Get-RemoteAccessConnectionStatisticsSummary and Get-RemoteAccessUserActivity which further drill down into what a particular user has been up to while connected to DirectAccess.

Make viewing and sorting Exchange 2013 / 2016 Message Tracking Logs using PowerShell easier with GridView

exchange2010-powershell-logoSo a lot of environments are making the jump to Exchange 2013/2016 away from 2007/2010. From a management point of view the largest change is the move away from a GUI Management option to web-based and PowerShell management. One of the tools missing is the Message Tracking tool, which in a basic form is available on the Web Console but is difficult to use for external mail items so then we move onto PowerShell which gives us what we want but not in the format that is the easiest to understand.

You can use things like FormatList or FormatTable to make things a little prettier but a nicer trick I learned recently was to use Out-GridView which formats things into a new window which we can apply filters to. An example of Get-MessageTrackingLog piped to GridView is below (see the image for the example output)

Get-MessageTrackingLog -ResultSize Unlimited -Start "November 10 2016" -End "November 30 2016" -Recipient "[email protected]" | Out-GridView

Using the GridView we can easily apply filters to further narrow down our search easier.

Adventures with setting up RDS RemoteApp and Web Access in Windows Server 2012 R2

RDS Overview in Server ManagerSo I was recently setting up a demo environment in Azure with two servers.  Our goal was to have Remote Web Access and then publish RemoteApps through that so we could give live demos.  The process to setup Remote Desktop Services is much easier in Server 2012 / 2012 R2 thanks to the Add Remove Features Wizard, but there are still some gotcha’s that I encountered and will cover in this blog post.

The first thing was getting the FQDN of the RD Gateway / Web Access server set to our external domain (since it is different). For example we’ll use adatum.internal and adatum.com.au.  For web access it is simply a matter of having a public DNS record and pointing to your web server but getting it working for the RD Gateway requires some PowerShell.  A script from the TechNet Gallery called Change published FQDN for Server 2012 or 2012 R2 RDS Deployment works a treat for Server 2012 and 2012 R2.  Simply go to the directory you have the script in with a PowerShell admin prompt and enter the following;

Set-RDPublishedName "remote.adatum.com.au"

This should now allow clients to see a connecting to a proper server FQDN instead of something like rds-01.demo.adatum.local.

My next issue was when my demo client when to connect it errored out with 0x607 – An authentication error has occurred.  After having a talk with someone in the office I had found out the Session Host server was hosting some demo web apps that ran using HTTPS.  Now I had imported a proper certificate (that hadn’t expired) but still found this issue.  So I opened up mmc.exe added the Certificates snap-in, browsed the computer certificate store and under personal I could see an EXPIRED certificate.  I deleted this but was still getting the error.  So my other trick was to force Terminal Services to no longer try to use that certificate.  To do this I opened up REGEDIT and went to the following key;

HKEY_LOCAL_MACHINE\SYSTEM\CurrentControlSet\Control\Terminal Server\WinStations\RDP-Tcp

In this key I would scroll down until I found SSLCertificateSHA1Hash and deleted the entry (you could also replace the hash with our good certificate).  Once I had done this, I restarted the server for good measure and was then able to connect up to my Remote Apps using Web Access without an issue.


Adjust resource mailbox calendar permissions on Exchange 2010/2013 using PowerShell

Quick one today.  By default, when creating a room resource mailbox, Exchange will grant default permissions of AvailabilityOnly for any user (default), if you are after people knowing who has booked a room or resource then you can adjust the permissions to Reviewer. The quickest way to do this is via PowerShell, you can use the following cmdlet;

Add-MailboxFolderPermission -Identity MeetingRoom2:\Calendar -user "Staff - All Staff" -AccessRight Reviewer

I am using a group (called Staff – All Staff) in the above that does not have any permissions already applied to that mailbox calendar. If the user or group already has some kind of permission, you will need to use Set-MailboxFolderPermissions instead of Add-MailboxFolderPermissions.

If you have multiple Resource Mailboxes, you can pipe a Get-Mailbox to hit them all at once like so;

$rooms = Get-Mailbox -RecipientTypeDetails RoomMailbox
$rooms | %{Add-MailboxFolderPermission $_":\Calendar" -User "Staff - All Staff" -AccessRights Reviewer}

Hope that helps.

PowerShell Script to Install Updates Offline in a WIM image using DISM

WSUS Offline Downloader in actionI’ve been helping out a customer build a new MDT deployment environment and move away from Ghost and the 90’s. As they are not going to be implementing Systems Center Configuration Manager and SUP to automatically maintain their images offline any time soon, we need a way to keep their image up to date with updates, without having to re-build it every time.

I knew you could already do offline servicing with DISM but wanted to make it nice and easy for them. I’m using WSUS Offline Update to download all of the updates in one shot, you could also use WUD but their lists haven’t been updated for a while.  I copied the zip and extracted it to their deployment server and downloaded all of the updates for Windows 7 x64 SP1 and saved them all to a single updates folder. I then built up the below PowerShell script to offline service their image and apply the updates downloaded.

$UpdatesPath = "E:\Updates\*"
$MountPath = "E:\MDTDeploymentShare\Operating Systems\W7X64SP1\Mount"
$WimFile = "E:\MDTDeploymentShare\Operating Systems\W7X64SP1\REFW7X64.wim"

DISM /Mount-Wim /WimFile:$WimFile /index:1 /Mountdir:$MountPath
$UpdateArray = Get-Item $UpdatesPath
ForEach ($Updates in $UpdateArray)
{
DISM /image:$MountPath /Add-Package /Packagepath:$Updates
Start-Sleep –s 5
}
Write-Host "Updates Applied to WIM"
DISM /Unmount-Wim /Mountdir:$MountPath /commit
DISM /Cleanup-Wim

If you have 100+ updates this process can take a while so sit back and drink a coffee while you run the script. Hope that helps.

Setting item level (Calendar, Tasks etc) permissions for Mailboxes and Users with PowerShell for Exchange 2007, 2010 and 2013

Every so often I get a request to allow people to view someone else’s calendar. Usually I just tell that person to go and ask whom ever the calendar belongs to, to give them permission. This isn’t always possible though as on a few occasions where I’ve had to give access because that other person is away.

With mailboxes you can use the management tools to give access rights, but what if I just want to give the, access to a calendar or tasks for example. This is where the exchange PowerShell console comes in. I can give a user Permission to a particular object. So for example I wanted to give user1 permission to edit manager 1’s calendar, I would do the following

Add-MailboxFolderPermission -identity manager1:\Calendar
-user user1 -accessrights Editor

You can use the following on all of the Outlook Exchanged based folders like so replacing <User> with the identity of the mailbox with the object you want to modify the permissions of and <delegate_user> with the username of the person of who you are giving permission to;

Add-MailboxFolderPermission &lt;User&gt;:\Calendar -User &lt;delegate_user&gt; -AccessRights Editor
Add-MailboxFolderPermission &lt;User&gt;:\Tasks -User &lt;delegate_user&gt; -AccessRights None
Add-MailboxFolderPermission &lt;User&gt;:\Inbox -User &lt;delegate_user&gt; -AccessRights None
Add-MailboxFolderPermission &lt;User&gt;:\Contacts -User &lt;delegate_user&gt; -AccessRights None
Add-MailboxFolderPermission &lt;User&gt;:\Notes -User &lt;delegate_user&gt; -AccessRights None
Add-MailboxFolderPermission &lt;User&gt;:\Journal -User &lt;delegate_user&gt; -AccessRights None

You can also quickly check who has access to an object (like a calendar) by using the following cmdlet, again replacing <user> with the identity of the mailbox;

get-mailboxfolderpermission -identity &lt;user&gt;:\Calendar

Hope that helps someone.