Time is more critical in Active Directory than many admins realise. Time inaccuracy can cause logs to mismatch or things like license failures for anything with DRM. Larger time differences can begin to cause authentication failures since Keberos relies on accurate time or affect replication health.
 By default, all AD member machines synchronise with any available domain controller, and in turn domain controllers will synchronise with the PDC Emulator of that domain. This article by Microsoft explains most of the above along with a similar overview of setting up Time Sync correctly. Whenever doing a large audit for an on-premise AD customer or have the chance to build out a new AD Forest, we always recommend ensuring that the PDC gets it’s time from an accurate external time source, and I’ll usually go as far as setting up a set and forget GPO to manage this to ensure newer PDCs get this treatment.
To ensure we target only our PDC emulator we can create a WMI filter that we can use against the Group Policy object that we’ll be creating shortly. The following WMI query will filter a PDC Emulator in an AD environment
select * from Win32_ComputerSystem where DomainRole = 5
Next step is to create the Group Policy Object, in this case I’ve create a PDC External Time Sync GPO, open it up and go to Computer Configuration > Policies > Administrative Templates > System > Windows Time Service > Time Providers. We now want to configure the following settings as follows
Set Configure Windows NTP Client to Enabled
For NtpServer enter your NTP servers details: ntp.nml.csiro.au,0x9 ntp.monash.edu,0xa
For Type set to NTP
Set Enable Windows NTP Client to Enabled
Set Enable Windows NTP Server to Enabled
It’s also important to ensure you’re specifying the correct flags to ensure reliable time, with my example I’ve specified a primary and secondary time source to minimise any potential drift when Windows decides to synchronise. By making the primary NTP server flag 0x9, we made it “Client 0x08 + SpecialInterval 0x01” and as for the second NTP time server.
By making the secondary NTP peer flag 0xa, we made it “0x08 Client + 0x02 UseAsFallbackOnly”.The following options are available to use with w32tm.
0x01 SpecialInterval
0x02 UseAsFallbackOnly
0x04 SymmatricActive
0x08 Client
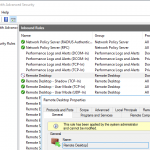
The final GPO should look something like this with the WMI filter attached an linked to an OU with your DCs. 
Since I’m based in Australia I’ll tend to use au.pool.ntp.org or use the Australian Governments NMI NTP service, which requires you to get your public IP whitelisted but is unlikely to be poisoned or attacked unlike the NTP Pool project.
Hope that helps.