A customer of ours has a large archive of files located on a NAS device (around 15TB worth) that they want to simply push off to tape and then remove from the NAS. Network drives don’t show up in Veeam whilst creating backup jobs, so we needed a way to get this working. We use Veeam with a number of customers and understand quite well how things operate with it, as such whenever Veeam is working with a local file system it does so under the Local System context, which is what we need to get our mapped drive under, but how.
PSExec from SysInternals to the rescue. We can create a command prompt in the context of local system and then map our network drive for it to appear in Veeam’s Job Wizard. Grab the latest version and place that in the System32 directory under the Windows folder. Now we open an administrative command prompt and enter;
psexec -s -i cmd.exe
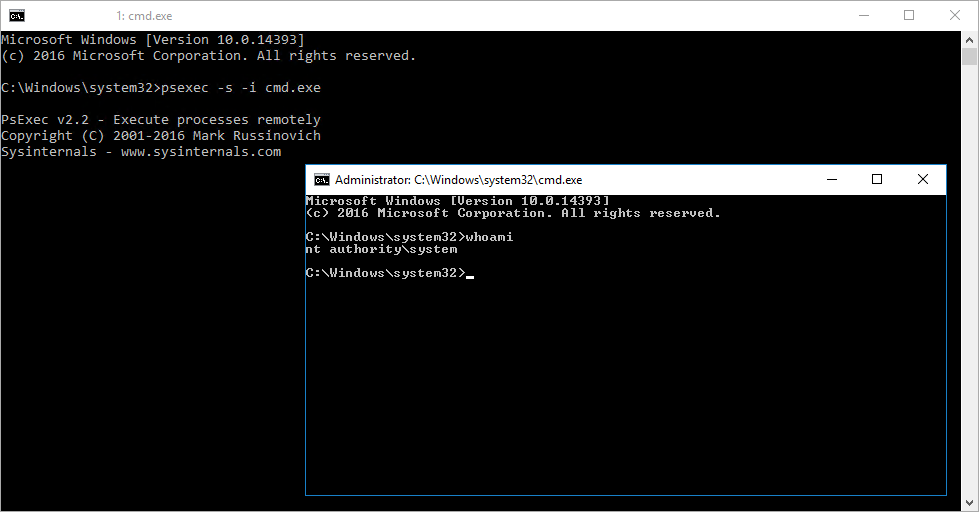 This opens a new window which is now running under our Local System context, which we can double check by using the whoami command. Our next step is simply to map the network drive using a NET USE command. We need to ensure we pass through some credentials as the local system will not have access to the share.
NET USE G: \\NAS\Archive /USER:Domain\User
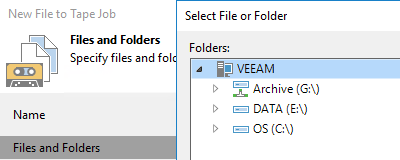 Now we can go into Veeam and run our Create File to Tape wizard and during our Files and Folders selection, we can now see our mapped network drive (in this case G:\ or Archive) and add folders in from this mapped drive. We then proceeded to backup the data we needed onto tape for archive.
Hope that helps.