During my morning rounds of looking after clients’ servers, running SBS 2008. I noticed one was running out of space. It had recently been updated to WSUS 3.0 SP2, after doing a quick hard drive space check I found that SUSDB was over five gigabytes in size. Generally this database should be around one gig. Until I had some time to investigate I thought the best thing to do was to move it to another hard drive, easier said than done.
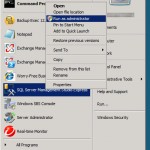
Just a little tip, if you are running under Windows SBS 2008 then you will need to  will need to run the Management Studio as an Administrative user by right clicking and selecting “Run as Administrator”. This will allow you to connect to the Internal Database as your SBS Admin user doesn’t have permission to do so.
Once the logon screen appears, your first thought would be to simply select the Microsoft##SSEE instance seeing as that is what the internal database is called but it still won’t connect. You need to connect via named pipes. Do so by typing the following into the server name field:
\\.\pipe\MSSQL$MICROSOFT##SSEE\sql\query
Once connected you should be able to SUSDB under the Databases list. To move the database is quite simple, we will detach, move the database files and then re-attach the database. Best to stop the Update Services Service before continuing (via the Services Snap-In).
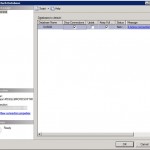
 Once in Management Studio, expand Databases and right click on the SUSDB database. From there click on Tasks and select ‘Detach…’ a dialog window will pop up. We will want to ensure that SQL Server drops any connections to the database to ensure a successful detachment of the database, so tick ‘Drop Connections’. Once the process is complete, minimise the Management Studio and navigate to the databases location (usually under ‘c:\wsus\SUSDB’) and move the folder to a location with more space.
Once that is done, we can re-attach the database. Maximise the Management Studio and right click on Databases and select ‘Attach…’. From here you are presented with another dialog box, click on the Add button and select the new location of the SUSDB that we just moved. Once you have selected the database simply click on Ok and SQL Server will do the rest.
Start the Update Services service and WSUS should be fine and work just as it was before the move.
this worked, didn’t even reliaze there was a problem until we added a win 7 64 workstation to sbs network, then trying to get sbs to update windows update services started giving the above mentioned error.thanks again.